
How a tile shower is built
Most tile companies never show you a photograph of a pan liner, a poured base or a curb — the parts of a shower nobody sees again once the tile goes up. We do, because that work is what decides whether the shower we build is still dry in fifteen years. Below is the order it actually happens in: framing first, tile last.
Call 704-305-2851The five stages, in motion
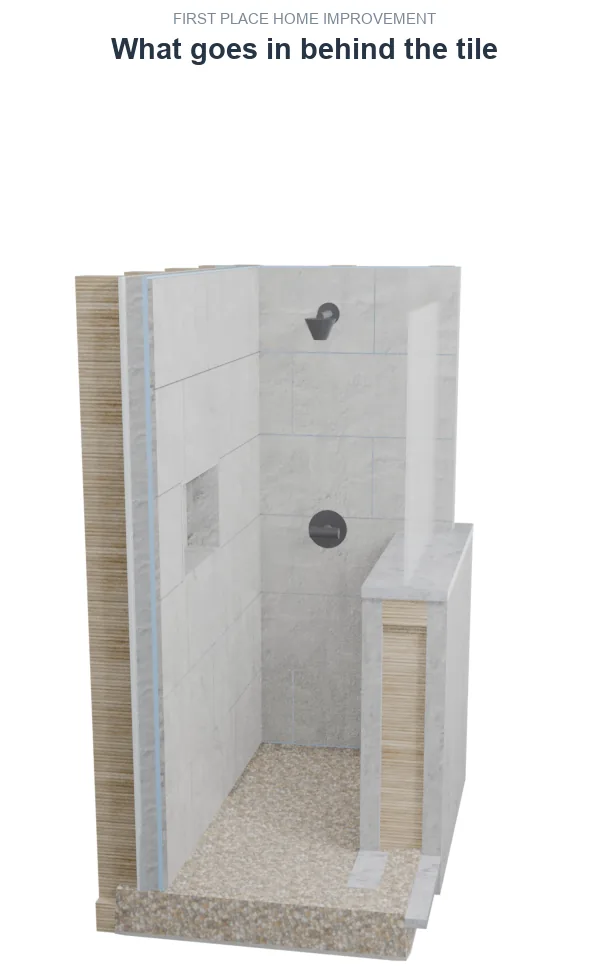
The photographs below take this one stage at a time, and the animation runs the same build in one continuous piece, with the wall cut back so you can see where each layer lands on the one under it. Both are numbered in five stages, and the first four are the same four. The fifth is where they part company: the photographs stop at the dry layout, and the animation carries on to the finished tile, the pebble floor and the glass.
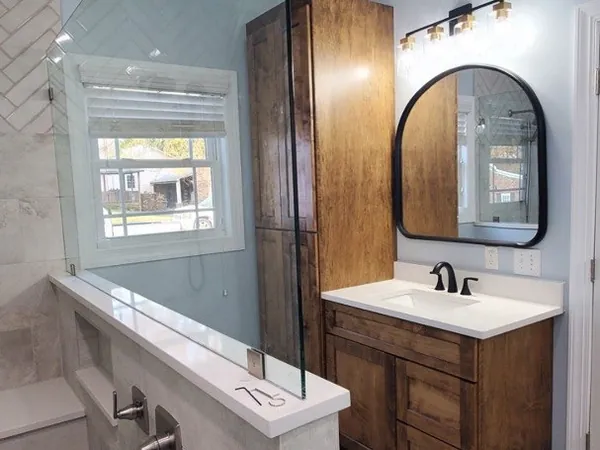
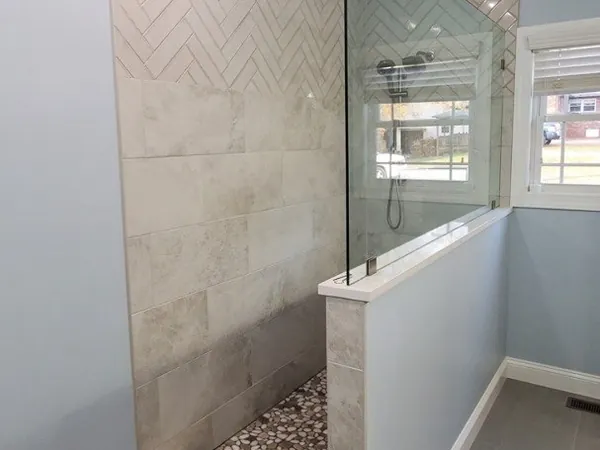
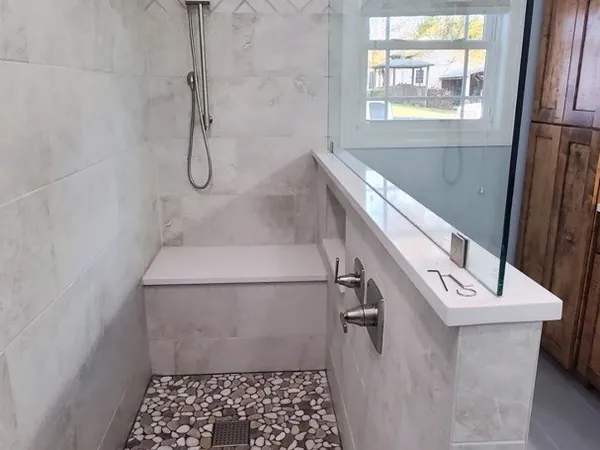
Water runs downhill to the drain — before a single tile is cut.
A cross section of a shower wall meeting the floor. From the stud out, the wall is built in layers: framing, backer board, waterproofing membrane, thinset, and tile. Along the floor, a rubber pan liner goes down first, then a poured cement base on top of it, sloped by hand, carrying water to the drain before the thinset and tile go on.
Before this, the old shower or floor comes out and we clear the space back to the framing. What we find behind it decides the day: rot in the framing under an old shower gets dealt with before anything goes back in.
Framing, blocking and the niche
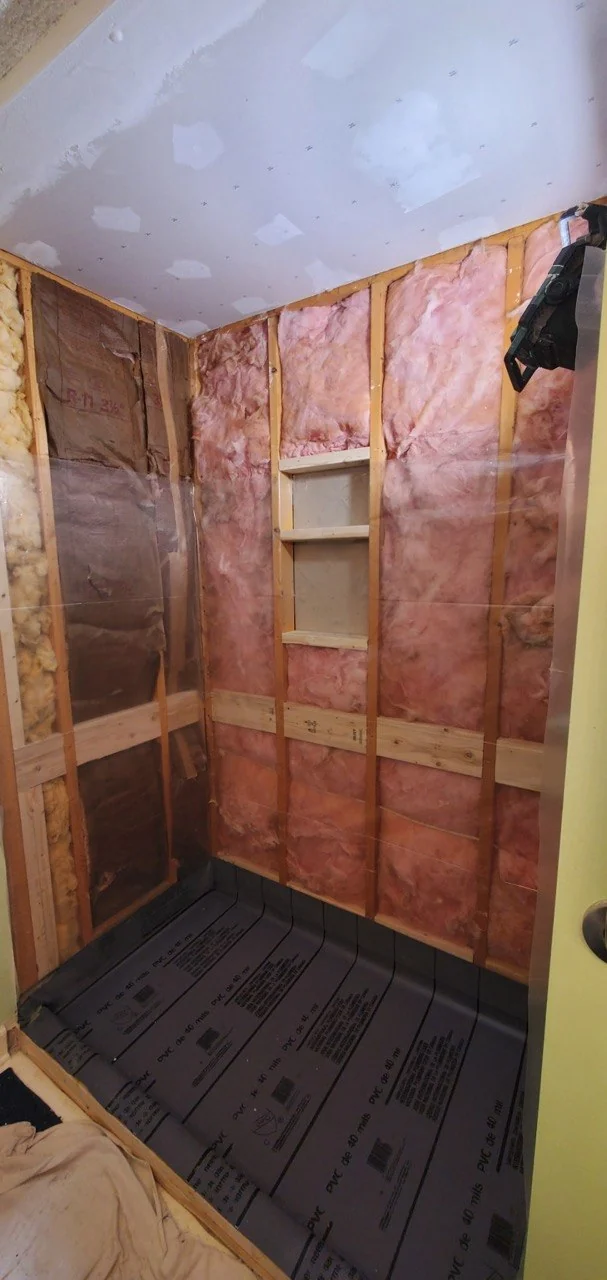
From one of our own jobs.
The walls are still open. The niche is framed between two studs and blocked solid top and bottom, the insulation goes in, and plastic goes over the raw framing to protect it. Everything that will ever have to hold weight or be cut into the wall gets dealt with now, while there is still room to reach in.
A niche cut in after the wall is closed has nothing behind it. Framed and blocked first, it carries a bottle of shampoo, a hand on a bad morning and fifteen years of water without moving.
Plastic, then the rubber pan liner
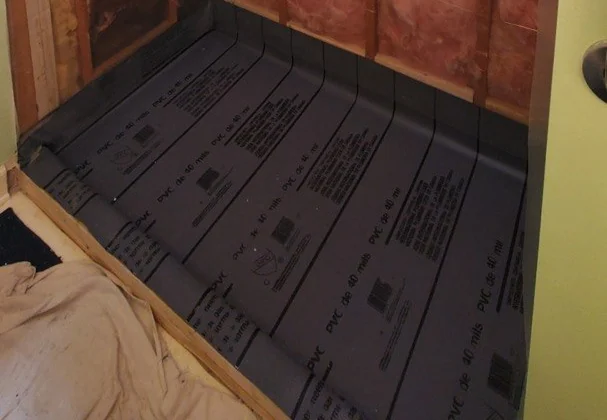
From one of our own jobs.
A rubber shower pan liner goes down across the whole floor and turns up the walls and over the curb. It is the layer the cement base is poured on top of, so it is the last thing that will ever see water if anything above it ever lets go.
Tile and grout are not waterproof, and grout takes on water by design. Water that gets through has to land on something that will not let it into the framing. That is this liner, and it is why it goes under the base rather than over it.
Cement board, then waterproof paint
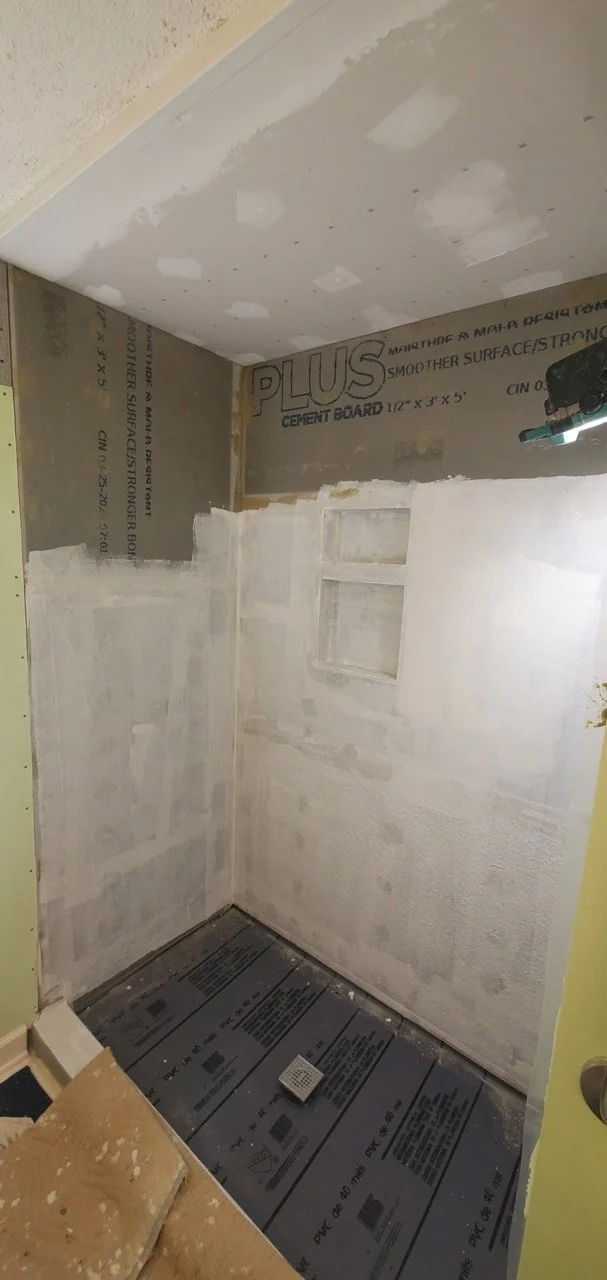
From one of our own jobs.
Cement board goes on the walls, screwed on the pattern the manufacturer specifies and taped at every seam. Then the whole thing gets a waterproof coating painted over it, walls and niche, before any tile. That is the second waterproofing layer on this job: the liner under the base, this over the board.
Drywall behind tile is the most common reason an old shower has to come out. It is paper and gypsum, it takes on water, softens, and takes the tile with it. Cement board does not care, and the coating on top of it means the wall is sealed before the tile that everyone actually looks at ever goes on.
The poured base and the slope
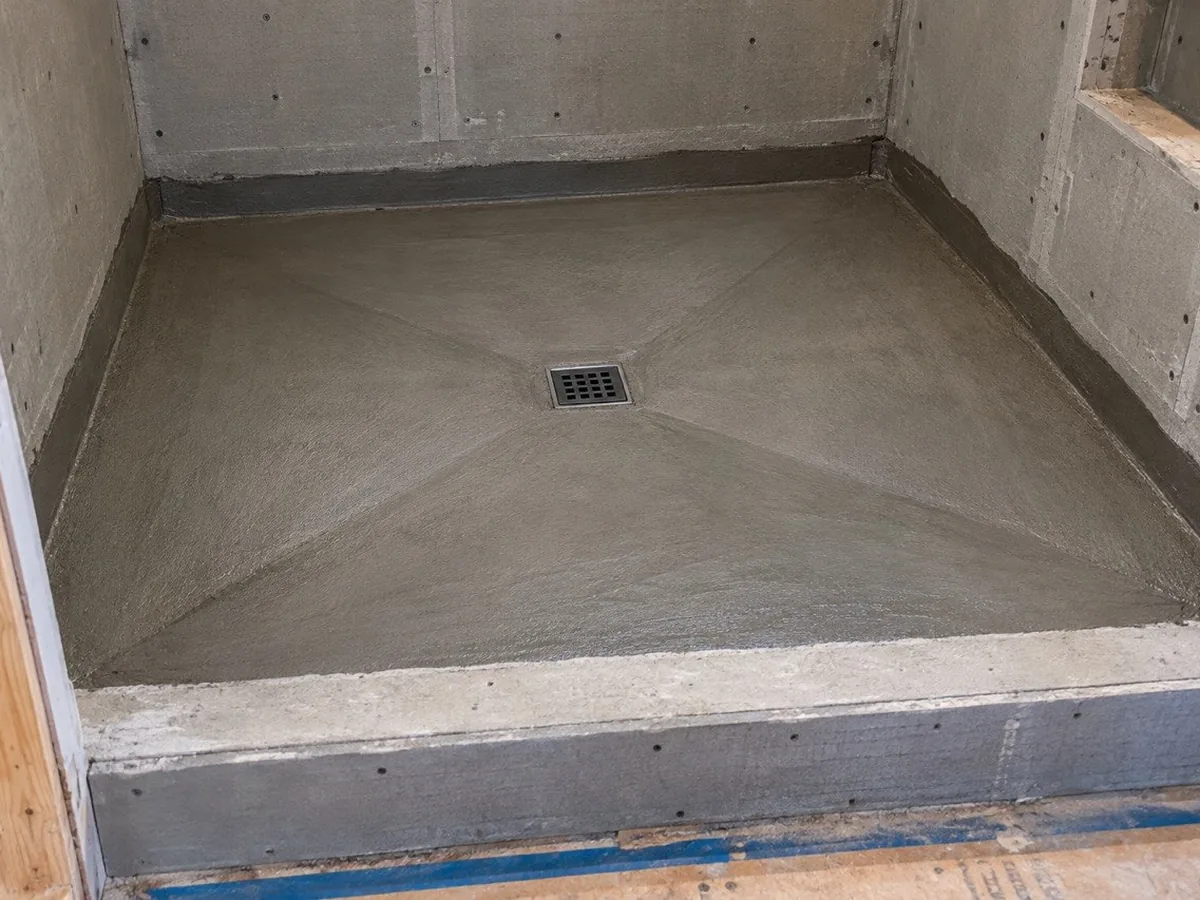
We pour our bases. The floor of the shower is cement, packed and shaped by hand so that every part of it falls to the drain.
Water finds the low spot whether anybody planned one or not. A base that is flat, or that falls to the wrong place, will hold a puddle in the same corner for the rest of its life, and no amount of tile on top will fix it. A poured bed takes longer than dropping in a ready-made pan, and it is the reason the fall suits your room instead of the mould it came out of.
The layout, before any thinset
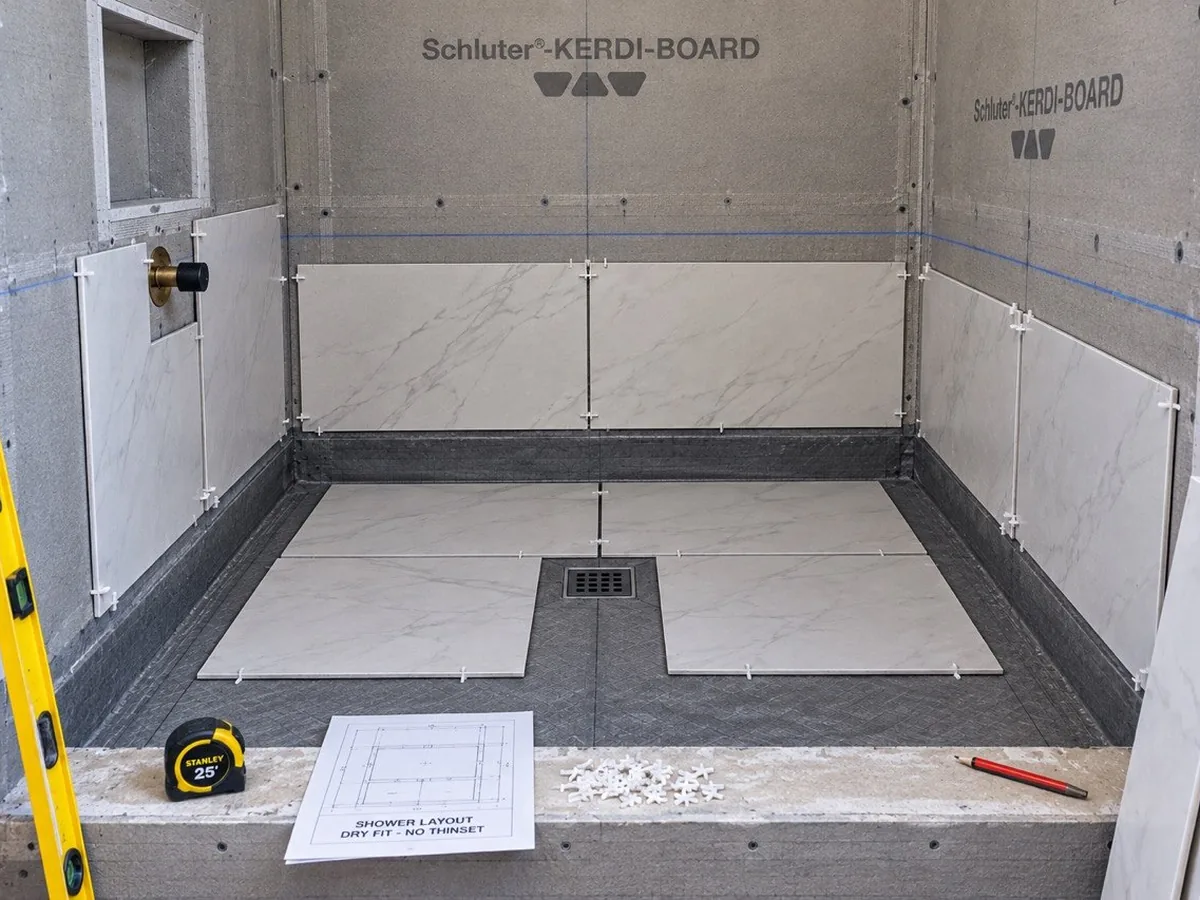
Before we open a bag of thinset we lay the tile out dry: lines struck for level, spacers in, full tiles where the eye lands, cuts moved to where nobody looks. The layout is doing more for your finished job than anything that happens after it.
A first row set an eighth of an inch out of level is out of level all the way up, and it gets worse with every course. Once the thinset is down the layout is decided. This is the last moment it is free to change.
After this we set the tile to the layout, grout it and clean it off before it sets, then seal it and hand the room back.
See how the week goes, day by day for the full sequence, tear-out through seal.
Talk to Darrell about your shower
We pour every base, hang every board and wrap every curb ourselves. Call or send a photo of your bathroom and we'll tell you what we see.
See also: custom tile work in Kannapolis, NC, bathroom remodeling in Kannapolis, NC and kitchen backsplashes and tile floors.